
What a Lace Front Wig Is
A lace front is a feature at the front edge of a wig cap, not a description of the entire cap. A fine, sheer panel creates a place for hair to emerge along the forehead-facing edge, while the rest of the cap may use other materials and construction methods. Lace coverage and hair placement can differ, so two lace front wigs may not offer the same appearance or styling area. The UK Wig and Hair Topper Guide is an independent English information guide; it does not sell products or provide services. The location of lace clarifies what a product label does—and does not—tell you.
The Lace Front Feature
A lace-front feature is a sheer or fine-mesh panel positioned at the front of a wig cap, along the edge intended to sit near your forehead. Hair is attached along this panel, commonly as individual strands knotted through the mesh or in small groups, depending on the design. Because the fine material can be less noticeable against the skin than a solid cap edge, the hair may appear to emerge from near the scalp. This can create a more natural-looking wig hairline, particularly when the lace and hair placement suit your skin tone and chosen parting. The feature describes only the front zone: it does not tell you whether the crown or back is lace, wefted fabric, or another material. Nor does the term alone specify the panel’s dimensions, density, or finish. Treat “lace front” as a useful construction label, then check the cap description for the rest of the design.
Lace Front and Full Lace
A lace-front cap has lace at the front, while the remaining cap is made from other materials. That area may include wefted sections, fabric, or a different type of hair-bearing panel. A full lace cap, by contrast, uses lace across the cap rather than limiting it to the front. Hair is attached across that broader lace area, so the distinction is about the extent of lace coverage and the cap’s overall construction—not simply how realistic the front looks. Coverage affects where the hair can be parted or arranged. On a lace-front design, the lace-supported styling area is generally concentrated at the front; parting options elsewhere depend on how the rest of the cap is built. A full lace design can allow parting in more areas because lace extends across more of the cap, although the usable styling range still depends on hair attachment, density, and the particular construction. Neither label guarantees a specific parting pattern, unrestricted styling, or an identical appearance across brands. When comparing descriptions, look for a clear account of how far the lace extends and where hair is attached. Choose by the areas you want to part or arrange, rather than assuming that every lace front behaves like a full lace cap.
Why Designs Differ
The label “lace front” leaves several design details open. Lace panels can differ in width, shape, placement, and material; their shade and transparency also affect how they appear against different skin tones. Some designs use finer, less visible mesh, while others use lace with a different texture or finish. Hair may be attached strand by strand or in groups, and the front density can range from a lighter hairline to a fuller appearance. A pre-plucked hairline has had some hairs removed or spaced to soften its density, but the amount of preparation varies. The materials beyond the front panel matter too. One cap may combine front lace with wefted sections, while another uses a different arrangement or additional lace areas. These choices influence where hair can be parted and how the cap is constructed, but the label alone does not specify them. Product descriptions, close-up images, and stated cap details are more useful than the name by itself. For a practical comparison, check lace placement, hair attachment, front density, and the materials used across the rest of the cap before deciding which design suits your intended look.
How the Front Construction Works
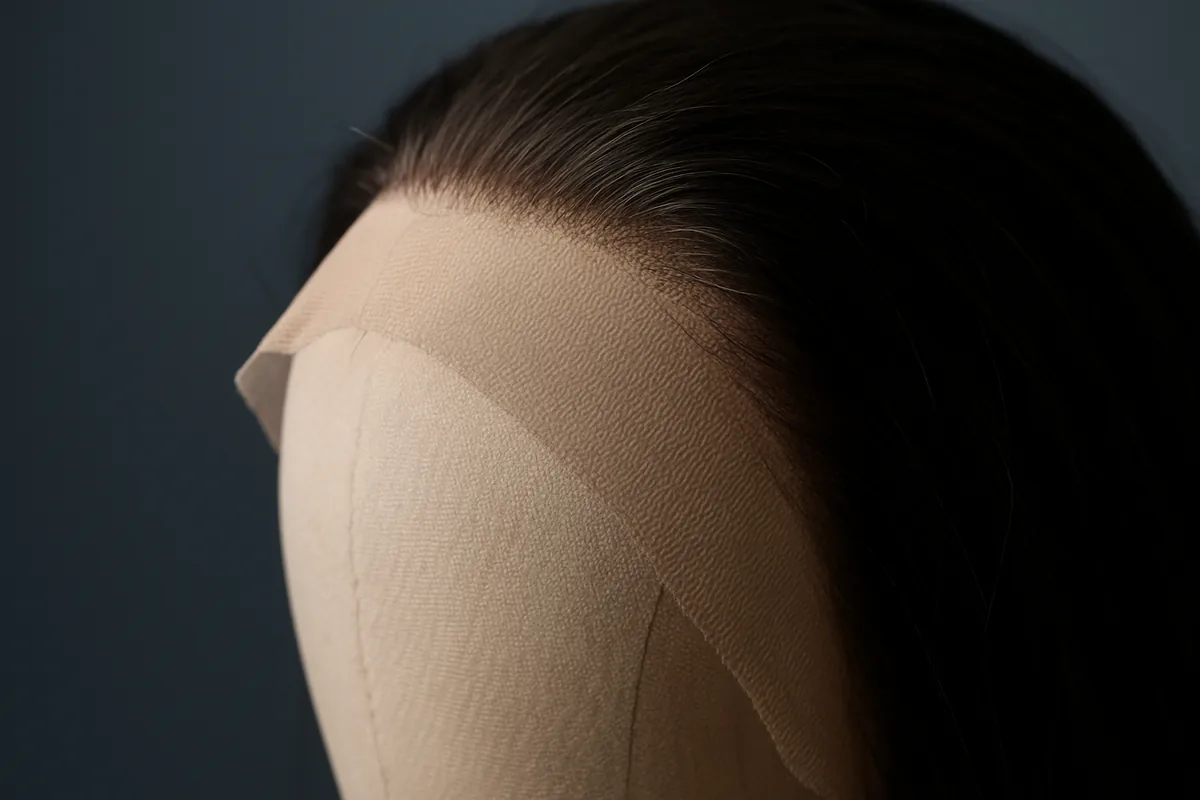
A lace front wig combines a lace section at the front with other materials across the cap. The lace panel supports individual hair attachment near the hairline, while the rest of the cap may use wefts, monofilament, or a combination. These areas can differ in material, attachment method, and layout within the same wig. The boundaries between these areas show how the cap is assembled. The details below identify the parts to inspect when comparing construction.
The Front Panel
The front panel is the section of lace positioned along the wig’s front perimeter, from temple to temple in many designs. It begins at the visible hairline and extends backward by a depth that varies by cap. This sheer area gives hair a base close to the forehead rather than placing a fabric edge directly at the front. Its size and shape determine how much of the front is made with lace, but do not by themselves describe the rest of the cap.
Hair may be individually ventilated through the lace, with each strand or small group secured by a knot on the underside. This method lets the attached fibers emerge at separate points instead of forming a continuous sewn line. Knot size, density, direction, and finish can vary across the panel; some fronts use finer work near the perimeter and denser attachment farther back. Other designs may use a different attachment method, so the product’s construction details matter more than the word lace alone.
The lace edge marks the transition between the panel and the surrounding cap, and it may sit at, or extend slightly beyond, the intended visible hairline. Some designs have a pre-shaped hairline, while others have a more uniform front edge. The hair attached nearest the edge can be arranged to soften its outline, but that arrangement is separate from the physical boundary of the lace. When comparing lace front wigs, examine where the panel ends and how the attached hair is distributed across its front edge.
How the Panel Joins the Cap
The lace panel does not usually make up the entire cap. Its rear and side edges meet adjoining sections that can be made from stretch fabric, mesh, monofilament, or wefted construction. The join forms a change in material and often a change in how hair is attached. A seam, binding, or reinforced edge may mark that boundary, depending on the cap design; the exact finish is not uniform across all wigs.
In some caps, the lace is sewn to a fabric base, with stitching following part or all of the panel perimeter. In others, the lace and neighboring sections are assembled with a less visible transition. Hair on the lace may be individually tied, while hair in an adjoining area may be attached in rows or ventilated through a separate panel. Those different methods can coexist without making the whole cap a single construction type.
Check the join from both the inside and outside if the cap is accessible. From inside, note whether stitching, a narrow band, or a change in mesh marks the connection; from outside, observe whether the transition affects the direction or spacing of the hair. The lace front wig construction label alone may not describe these details. A clear view of the panel boundary and the materials beside it gives you a more specific picture of how the front connects to the cap.
Wefted and Monofilament Areas
Wefts are rows of hair attached to a narrow strip, then sewn or otherwise secured to the cap. They may cover the crown, sides, or back behind a lace front. Monofilament is a fine mesh area through which hairs are individually attached; it may form a parting zone or a larger section farther back. A cap can combine either material with lace at the front, so these terms describe particular areas rather than the whole wig.
When you inspect the interior, use these construction details to compare how the front relates to the rest of the cap:
- Panel location: Identify how far the lace extends from the front edge and where its side and rear boundaries meet the cap materials.
- Attachment method: Check whether hair on the lace is individually knotted, while hair behind it is secured in wefts or ventilated through mesh.
- Seams and edges: Look for stitching, binding, or reinforced borders at the joins, noting whether the seams follow the panel perimeter or cross adjoining sections.
- Parting area: Locate any monofilament section and note its position, shape, and size relative to the lace panel and the crown.
- Weft placement: Observe where the rows begin and end behind the front, and whether they run across the back, sides, or both.
These observations distinguish the lace area from the cap sections behind it without assuming that one layout performs the same as another. For a clear construction comparison, prioritize the panel boundary, attachment method, and location of any parting section.
Lace Fronts Compared with Other Caps
A front cap can shape the visible hairline and influence where hair can be parted or directed. Lace, monofilament and wefted fronts use different materials and attachment methods, so their styling options are not identical. Labels alone do not show how wide a front panel is or where it ends; the full cap layout matters. Compare the construction details with the styles you expect to wear.
Construction and Trade-Offs
The front construction describes the material and method used where hair meets the face. The table compares common designs; individual caps may combine more than one method.
| Front type | Construction | Styling considerations | Limitations to check |
|---|---|---|---|
| Lace front | A lace panel at the front carries hairs individually, with the rest of the cap commonly made from another construction. | Can create a graduated-looking edge and allow hair to be directed away from the face, depending on panel shape and hair placement. | The lace area has a defined boundary; parting freedom does not automatically extend across the whole top. |
| Monofilament front | A fine mesh area supports individually attached hairs at the front; its size and placement vary by design. | May allow hairs to move within the monofilament area, including along a part where the mesh extends. | A front-only section does not provide the same parting area as a larger monofilament top. |
| Standard wefted front | Rows of hair attached to wefts form the cap, with the front edge finished according to the design. | Works with the direction and part placement built into the cap; a defined part may guide the finished style. | Visible wefts or a less graduated edge can limit styles that expose the front or require varied part placement. |
These labels are not interchangeable. A lace front may sit alongside a wefted back, while a monofilament section may be limited to the front or continue farther across the crown. Some caps combine lace at the hairline with monofilament elsewhere, so the name of one feature does not describe every panel.
Check the construction map or product specifications for the front panel’s shape, its transition into the cap and any separate parting area. The most useful comparison is the layout that supports your intended style without assuming that one front type offers the same options as another.
Styling Considerations
For styles that sweep hair away from the face, a lace front can provide a more graduated-looking edge, but the result depends on the lace panel’s shape, hair density and placement. A lace front wig hairline does not by itself confirm that the entire front can be exposed; check whether the panel reaches the temples and how it joins the cap.
Parting choices depend on where individually attached hairs are supported. A monofilament front may permit a part within its mesh area, while a wefted section generally follows the direction of its sewn rows or any designated part. A cap with a small front panel and a wefted top will not offer the same parting range as one with monofilament extending across the crown.
Hair direction also follows the cap layout: a side part, center part or brushed-back style should align with the areas that can be repositioned. Before choosing, compare the panel boundaries and any preset part with the styles you wear most. Match the construction to the intended part and direction rather than relying on the front label alone.
Fit, Care and Styling Details
A comfortable result depends on more than the lace at the front: cap measurements, adjustment features and the materials across the whole wig all matter. Check the size chart and care label for the specific design, since construction can change both fit and maintenance. The lace front wig fit should feel secure without relying on excessive tension. A few checks before wear and careful handling afterward can help you make a more informed choice.
Measuring for Cap Fit
Use a flexible, non-stretch tape measure and keep it close to the scalp without pulling tight. For circumference, start at the center of the front hairline, pass the tape above the ears, around the nape, and return to the starting point. Measure over the hair you expect to wear beneath the cap, arranged as flat as practical.
Compare the measurements below with the seller’s cap size chart; chart labels and measurement points can vary.
- Head circumference: Measure around the full perimeter, following the route from the front hairline above both ears and around the nape.
- Front to nape: Measure from the center of your front hairline over the crown to the point where the head meets the neck.
- Ear to ear across the forehead: Measure from the top of one ear to the top of the other, following the hairline across the forehead.
- Ear to ear over the top: Measure between the tops of the ears along the center of the head, rather than across the forehead.
- Temple to temple around the back: Follow the head’s curve from one temple around the back to the other temple.
- Chart range and cap features: Check the listed size range and note whether the cap includes adjustable straps or other fit adjustments.
Record each measurement and compare the same route with the chart instead of choosing by a size label alone. If your measurements fall between listed sizes, check the wig’s adjustment range and construction details before deciding; straps may refine fit, but they cannot change the cap’s basic dimensions.
Checking Fit and Adjustment
A stable cap sits evenly from the front hairline to the nape, with the ear tabs in a comfortable position and no persistent slipping as you turn your head. The lace should lie where intended without pulling sharply at the temples. Notice pressure, pinching or a gap at the nape; these can indicate that the cap dimensions or shape do not suit your head.
If adjustable straps are present, they can take up a small amount of slack and help keep the cap in place. Adjust them gradually and reassess the fit, rather than tightening until the front feels strained. Straps are not a substitute for a cap that is substantially too large or too small, and not every design includes them.
Check cap size and construction together. A wig cap may combine a lace front with other materials or seams that affect how it sits around the temples, crown and nape. Confirm where the front panel begins and how the rest of the cap is shaped before judging comfort. A comfortable fit is secure without concentrated pressure, and remains so through ordinary head movement.
Care for the Front and Cap
Handle the lace and hairline gently when putting the wig on, removing it or arranging the front. Hold the cap rather than pulling on individual hairs or tugging at the lace edge, which can place strain on delicate construction. Avoid brushing forcefully across the hairline; use the care label’s recommended tools and method for the wig’s hair type.
Follow the specific wig’s cleaning instructions for washing, products and drying. Lace, hair fiber and cap components may have different care needs, so do not assume that a method suitable for one material is suitable for the whole wig. If the label gives a water temperature or product restriction, follow it; if it specifies air drying, keep the wig supported in the recommended position until dry. Do not apply heat unless the material and instructions allow it.
After cleaning, check that the lace and cap are fully dry before storage. Keep the wig on a suitable stand or in its original packaging so the cap is not crushed, and store it away from dust, direct sunlight and heat sources. Avoid folding the lace front sharply or placing heavy items on top. The cap may include wefts, mesh, monofilament or other components, and their presence can change washing and drying guidance. For adhesive residue or lace customization, use only directions provided for that specific wig; avoid scraping or trimming by guesswork.
Styling the Front
Hairline placement affects how the front frames your face and where a part can sit. Position the cap according to its intended front edge, then check that the lace coverage reaches the area needed for your chosen part or swept-back style. A pre-plucked wig hairline may have a less uniform density at the front, but the actual pattern and coverage depend on the individual design.
Consider the adjoining cap sections as well as the lace. If the lace front joins wefts or another cap material behind the hairline, styling options may differ across those areas; a part that extends beyond the lace may show a different surface. Check the construction before choosing a deep part, lifting hair away from the face or changing the hairline. Trimming or customizing lace can be difficult to reverse, so follow the wig’s instructions rather than assuming every lace edge is prepared the same way.
Heat and styling products must suit the wig’s hair fiber and care instructions. Human hair and synthetic fibers do not share identical heat limits, and some synthetic wigs are not heat-safe. Use only the methods and products permitted by the manufacturer. For everyday styling, keep the chosen part within the available lace coverage and avoid forcing the front into a position that strains the cap; that is the simplest way to preserve the intended fit and finish.
When This Construction May Suit You
Whether a lace-front design works for you depends on the hairline you want, how you style your hair and what the rest of the cap allows. Lace materials, cap layouts and adjustment options vary, so one design may offer a different balance of appearance and handling from another. Your usual part and styling direction can help narrow the choices, but the lace area alone does not determine how the wig can be worn. Check the product’s construction and care guidance against your routine before choosing. The details below can help you assess those trade-offs.
Styling Preferences
A lace-front design may suit you if you want a hairline that can appear less defined than a solid fabric edge, particularly when the lace tone is close to your skin. HD lace and transparent lace differ in appearance and may look different across skin tones, lighting and application; neither guarantees an invisible edge. A pre-plucked hairline can reduce the density at the front, but the result still depends on the individual hair placement and how the lace sits.
Consider where you part your hair and which direction you usually style it. Some fronts allow a center or off-center part within the lace area, while the cap behind that panel may be wefted or otherwise constructed to restrict parting elsewhere. Check the listed parting area and styling limits rather than assuming the whole top can be repositioned. If you regularly wear a deep side part, select a design whose lace and cap layout accommodate that direction; if you mostly wear bangs or a forward style, a broad exposed part may matter less.
Care Routine and Wear
Your routine should match the specific lace and cap materials, not a general rule for every lace-front wig. A delicate lace edge may need careful handling when you put on or remove the wig, while the cap’s other materials determine how you wash, dry and store it. Read the maker’s instructions for water temperature, products and drying method; do not assume that heat tools or the same cleansing routine are suitable for every fiber and construction.
Also consider how often you are prepared to handle the front. Adhesive attachment can involve applying and removing product at the lace edge, whereas a glueless design relies on its cap fit and any built-in securing features. The amount of work varies by design and wear schedule, so confirm the stated method before choosing. If you prefer fewer steps, compare the care directions and attachment requirements for the exact cap rather than treating all lace fronts as equally demanding. Regular gentle handling and storage that keeps the lace from being crushed can help preserve the front’s shape.
Details to Verify
Before choosing, compare the product details with the way you plan to wear and maintain the wig:
- Lace placement: Check how far the lace extends across the front and whether its width and depth cover the hairline or part you intend to show.
- Construction behind the front: Find out whether the remaining cap uses wefts, a monofilament area or another layout, since that can limit parting and direction.
- Cap measurements: Compare the listed circumference and other available measurements with your own; do not rely on a general small, average or large label alone.
- Adjustment features: Look for straps, hooks or other stated adjusters, and confirm how much adjustment the cap allows rather than assuming they change its size substantially.
- Care guidance: Review the instructions for washing, drying, storage and any heat styling, including whether they distinguish the lace from the rest of the cap.
- Styling limits: Confirm the permitted parting area and attachment method, especially if you want a side part, a pulled-back style or glueless wear.
Choose the design whose documented lace area, cap layout and care steps fit your usual style and available time; those specifics matter more than the lace label alone.